Mastering Your Digital Palette with Procreate Color Swatches
For digital artists, the struggle to maintain color consistency across multiple projects is a familiar frustration. You spend hours perfecting a specific shade of teal for a character’s eyes, only to lose it when you switch canvases or accidentally reset your palette. This is where the concept of a Procreate Color Swatch becomes not just a convenience, but a necessity for professional workflow efficiency. Unlike manually picking colors every time you start a new piece, utilizing pre-configured swatch files allows you to import curated palettes instantly. This approach transforms how you manage color theory, branding, and artistic style within the iPad ecosystem.
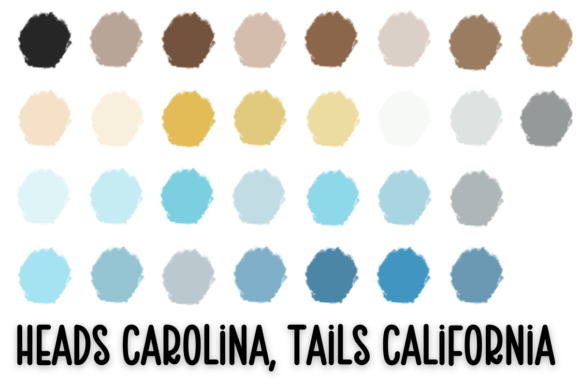
A Procreate Color Swatch is essentially a digital file that contains a predefined set of colors. When loaded into the application, these colors appear in your palette panel, ready for immediate use. The true power lies in the format: this comes as a file that can be directly loaded into Procreate. This means you do not need to manually input hex codes or try to recreate a gradient by eye. Instead, you are importing a structured resource that integrates seamlessly with your existing library. Whether you are an illustrator working on a children’s book series or a graphic designer creating social media assets, understanding how to leverage these swatch files can significantly reduce friction in your creative process.
Solving the Consistency Challenge
One of the primary challenges digital artists face is maintaining visual coherence. If you are working on a comic strip, a webcomic, or a series of illustrations for a client, the colors must remain identical from page to page. Without a standardized system, slight variations in hue or saturation can occur due to lighting changes on your screen or simple human error when selecting colors. By using a dedicated Procreate Color Swatch, you eliminate this variability. Every time you open your project, the exact same palette is available, ensuring that the protagonist’s shirt is the same red in chapter one as it is in chapter ten.
Beyond consistency, there is the issue of speed. Creative flow is fragile. Stopping to search for the right color breaks concentration and disrupts the momentum of drawing. When you have a library of swatches tailored to specific moods—such as "Moody Noir," "Pastel Spring," or "Cyberpunk Neon"—you can switch contexts instantly. This is particularly useful for freelancers who juggle multiple clients with distinct brand guidelines. Instead of memorizing hex codes, you simply load the client’s specific Procreate Color Swatch file, and their entire brand identity is at your fingertips.
Practical Applications for Different Users
The utility of these swatch files varies depending on your artistic goals. Here is how different users can approach this tool to maximize their productivity:
- Illustrators and Concept Artists: For those developing a unique visual style, creating custom swatches helps define a signature look. You might create a swatch based on a specific reference photo or a mood board. By saving this as a reusable file, you ensure that all your portfolio pieces share a harmonious color language.
- Graphic Designers: Branding requires precision. Designers often receive strict style guides from clients. Converting these guidelines into a Procreate Color Swatch ensures that any mockups or digital sketches adhere strictly to the brand’s primary and secondary colors. This reduces revision rounds and increases client trust.
- Hobbyists and Learners: If you are studying color theory, downloading swatches created by professionals can be an educational tool. Analyzing how a master artist groups their colors can teach you about complementary schemes, temperature balance, and value hierarchy. It allows you to paint with confidence, knowing the colors will work well together.
How to Implement Swatches Effectively
Implementing this workflow is straightforward, but doing it effectively requires some organization. Since this comes as a file that can be directly loaded into Procreate, the technical barrier is low. However, managing dozens of swatch files can become chaotic if not handled correctly. Start by categorizing your swatches. Create folders on your iPad or cloud storage for different categories such as "Portraits," "Landscapes," "Client Work," and "Experiments." Naming conventions matter; instead of naming a file "Swatch 1," use descriptive titles like "Sunset_Warm_Tones" or "Corporate_Blue_Grey."
When you find a Procreate Color Swatch online or create one yourself, test it before committing it to your permanent library. Open a blank canvas and apply the colors to see how they interact. Do the shadows feel too harsh? Is the highlight color bright enough? Adjusting the swatch before saving it ensures that the file is truly ready for production work. Remember, a swatch is not static; you can edit it within the app and save it again as an updated version if your needs evolve.
Enhancing Creativity Through Constraints
Paradoxically, having unlimited color choices can sometimes hinder creativity. This phenomenon, known as choice paralysis, can lead to endless tweaking rather than creating. A curated Procreate Color Swatch acts as a creative constraint. By limiting yourself to a specific set of ten or twenty colors, you are forced to think more critically about value, composition, and brush texture. This limitation often leads to more cohesive and striking artwork because the harmony is built into the tool itself.
Many professional artists recommend starting with a limited palette. For example, a "Zorn Palette" swatch restricts you to ivory black, white, yellow ochre, and vermilion. Using a pre-loaded swatch for this classic combination allows you to focus on painting technique rather than color mixing. As you become more comfortable, you can expand your library with more complex or vibrant swatches. The key is to view the swatch file not as a restriction, but as a foundation that supports your artistic decisions.
Where to Find Quality Resources
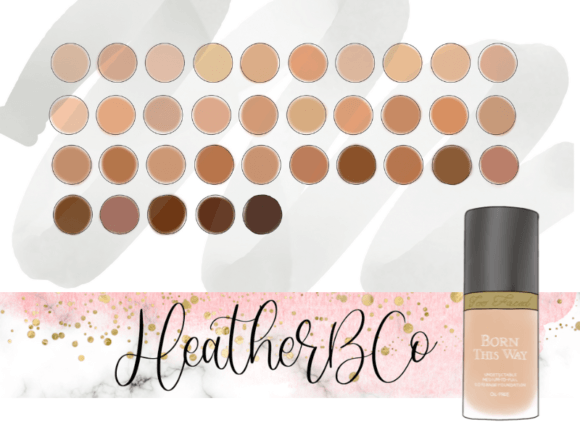
While you can create your own swatches by sampling colors from photos or paintings, many artists prefer to start with high-quality resources created by others. There are numerous communities and marketplaces where designers share free and premium Procreate Color Swatch files. When downloading these, look for creators who provide context. A good swatch pack should explain the intended use case, such as "ideal for skin tones" or "designed for landscape backgrounds." This context helps you decide whether the swatch fits your current project.
Additionally, consider creating swatches from your favorite real-world references. Take a photo of a beautiful sunset, a vintage poster, or a nature scene. Import that photo into Procreate, sample the dominant colors, and save them as a new swatch. This method allows you to capture the essence of real-life lighting and translate it into your digital work. Over time, you will build a personal library of Procreate Color Swatch files that reflect your unique observations and artistic interests.
In conclusion, integrating structured color files into your workflow is a small change that yields significant results. By recognizing that this comes as a file that can be directly loaded into Procreate, you unlock a faster, more consistent, and more professional approach to digital art. Whether you are aiming for brand accuracy, stylistic consistency, or creative exploration, mastering the use of swatches will elevate the quality of your output and streamline your daily practice.